Why do hackers travel by bus?
webmaster
12 de May de 2025
hacking

Yes, you might not believe it, it might sound strange, but hackers (the really bad ones, the ones who spend their days on the dark web doing shady deals) travel by bus.
Why, you ask…?
Well, it’s simple: because they know that many public transport systems use RFID prepaid cards. The typical ones you top up with a certain balance, and every time you get on a bus, train… you hold them up to a machine, and it deducts the corresponding fare from your balance.
And guess what? Many of these cards are not secure. Want to learn how to hack them?
Well, these types of cards use a set of standard protocols (the way they communicate with the reader).
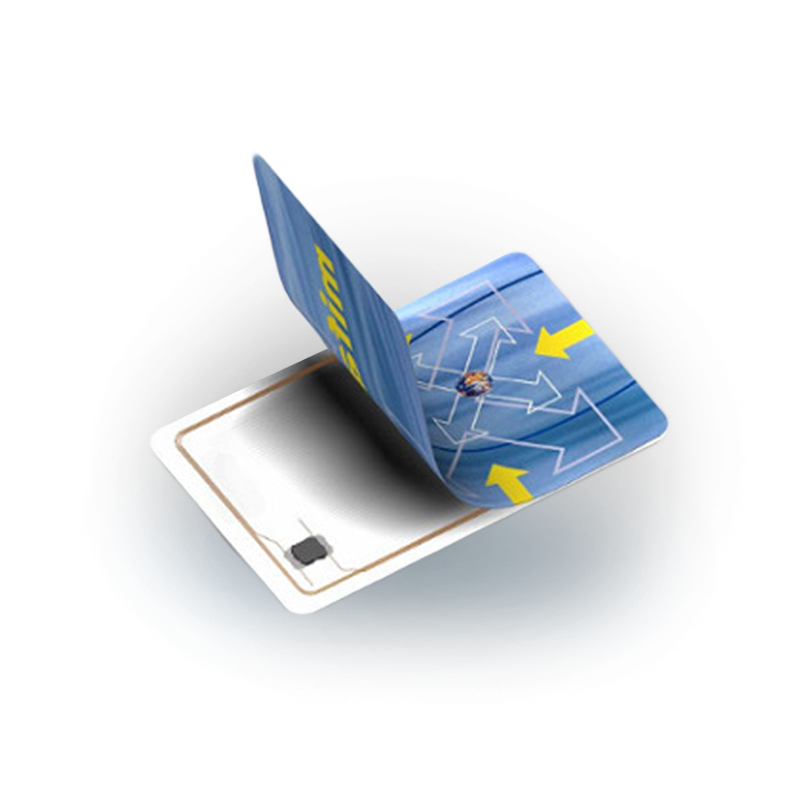
To manufacture these cards, a small chip and an antenna are used, which is nothing more than a coiled metal wire.
There are several manufacturers that make chips for these cards, following the standard protocols. In fact, some of these manufacturers helped define the industry standards at the time.
Now, the magic of what I’m going to tell you today lies in the chip. An RFID chip is nothing more than a small memory that stores a series of data (your remaining balance, the last time your card was used, the last time it was recharged… It will depend a lot on the purpose for which it is meant to be used).
If you stop to think about it, you’ll probably realize quickly that manufacturers need to prevent anyone from being able to read or write the contents of this memory. Otherwise, anyone could top up the balance they wanted (we’ll get to that part later). The typical way to protect this memory is by using a password.
Let’s go back to the chip manufacturers. NXP is one of the leading RFID chip manufacturers in the world, and years ago they released the Mifare Classic chip, which turns out to be one of the most commonly used in prepaid cards and access cards (offices, hotels, etc.). These cards are divided into 16 memory blocks, and each of these blocks has space to store two passwords, which can each be specified for reading, writing, both, or neither.
Mifare Classic cards use a system designed by their owner called Crypto-1. This system is used for authentication between the reader and the card, basically to check if the key being sent is correct or not.
NXP did not make this protocol public when it was created, instead keeping it secret, thinking that if no one knew how its mechanism worked, it would make it secure. This is what is known in the field as “security through obscurity”, and let me tell you, “security through obscurity” is anything but secure.
In 2008, a group of researchers from Radboud University in the Netherlands managed to break this encrypted system. How did they do it?
- First, they “spied” on the communication between a MIFARE card and its reader (like a subway machine). They observed how messages were exchanged.
- Then, with some reverse engineering and a lot of patience, they deciphered how Crypto-1 worked. The most surprising thing was that they discovered the system had significant flaws:
-
The keys were very short (only 48 bits).
-
The encryption system had design flaws that made it easier to predict or guess keys.
-
- From there, they developed tools like mfoc or mfcuk, which allow reading the content of many MIFARE cards in minutes, without knowing the keys.
Enough theory, let’s get to the practical part:
To test what I just told you, we will need an RFID HF card reader that we can connect via USB to our computer. In my case, I used a PN532, which you can buy for very cheap on Aliexpress, and a serial-to-USB converter to connect it to my PC.
Obviously, we need an RFID card to test with, and it should be one that we suspect might be a Mifare Classic 1k. You can buy Mifare cards for testing. They are very inexpensive.
In my case, and for educational purposes only, I will use an urban bus card.
Finally, we need the tools we will use: mfcuk and mfoc. Both tools are free and for the Linux operating system. They can be found on Github or come included in Kali’s repositories.
The first thing we will do is run the tool mfoc. This tool will attempt to perform what is known as a “nested attack”. This attack is based on authenticating to a sector with a known key. During the authentication process, the card will send us a nonce (an encrypted bit sequence) that is part of the conversation between the card and the reader. Once successfully authenticated, we re-authenticate with that same sector, and it will send us a different nonce. With the difference between both, we will know the keystream (the sequence used for encryption). Knowing how this bit sequence changes allows us to decrypt the rest of the keys of the other sectors.
When mfoc is launched for the first time, we are looking for two things:
- On one hand, the program will tell us if we are dealing with a Mifare Classic card (vulnerable).
- Secondly, it will try a bunch of common keys used in these types of cards to see if any of them are valid for any of the sectors, and if correct, it will attempt to extract the key for the rest of the sectors.
If the program successfully retrieves the key for all sectors, it will dump the content of the card into the file we specify.
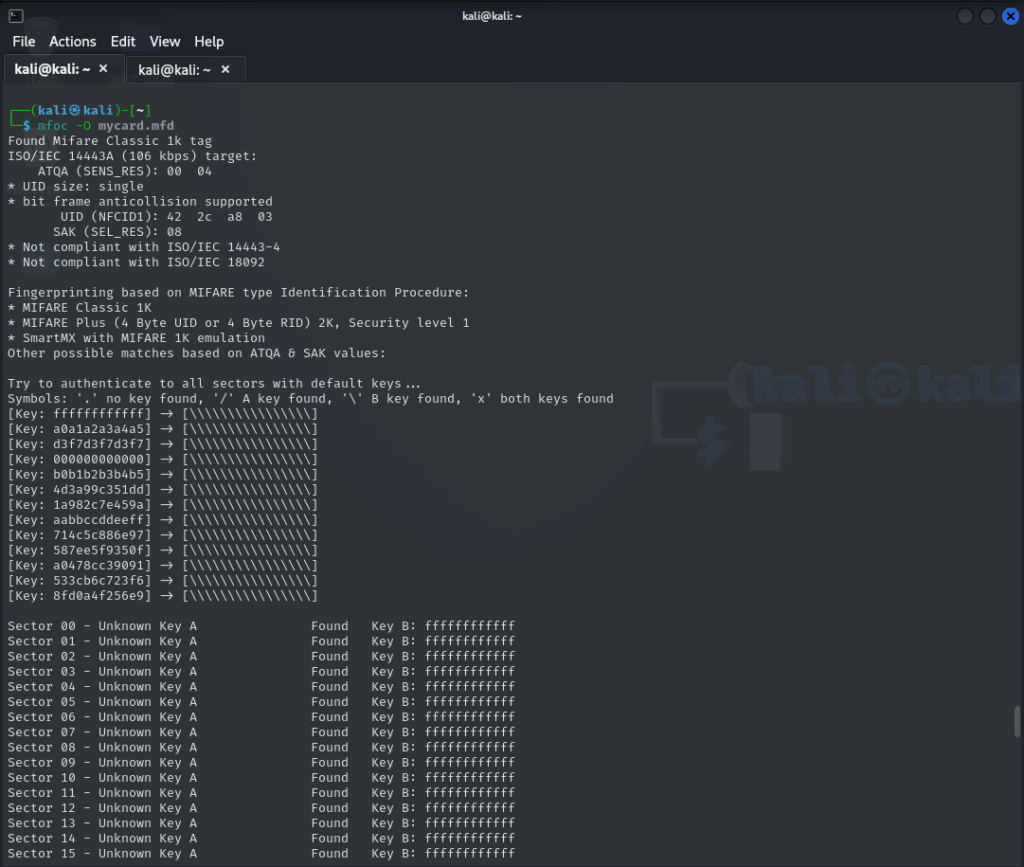
We launch the program and see the following:
- Indeed, we are dealing with a Mifare Classic 1k card.
- The B key is
ffffffffffffin all sectors (default), which indicates that the B key is not used for authentication. - The A key is unknown and is not among the common keys known to mfoc.
Since this method was not effective, we move on to try another type of attack: let’s try a dark side attack.

This attack is based on the nR and aR parameters that the reader sends to the card at a given moment. The card first checks the parity of this data, and if it’s correct, it then checks whether the values themselves are valid. If they are not (which is expected since we don’t know the key), the card sends back an error code 0x5 (but encrypted). Since we know both the encrypted code and its plaintext equivalent, we can determine the state of the keystream, which is what allows us to uncover the password.

Here we tell mfcuk, the other tool we mentioned early, to try to extract key A from sector 8.
Based on my experience with other tests, we should have the key in about an hour. However, after two days, the PC was still working without success.
This fact makes me suspect that there’s something strange about this card.
Something very common nowadays is that some Chinese chip manufacturers produce their own chips, which they can configure (by writing certain bits in a specific memory area) to behave as if they were another manufacturer’s chip.
To the card reader, they appear to be a MIFARE Classic 1k, but in reality, they’re something entirely different.
The problem with these clones is that they behave similarly in practice, but they might not respond with the same error codes in certain situations, or their response times may differ—causing these types of attacks to fail.
Be aware that you might also be dealing with a patched version of the MIFARE Classic chip, meaning keystream-based attacks would no longer work.
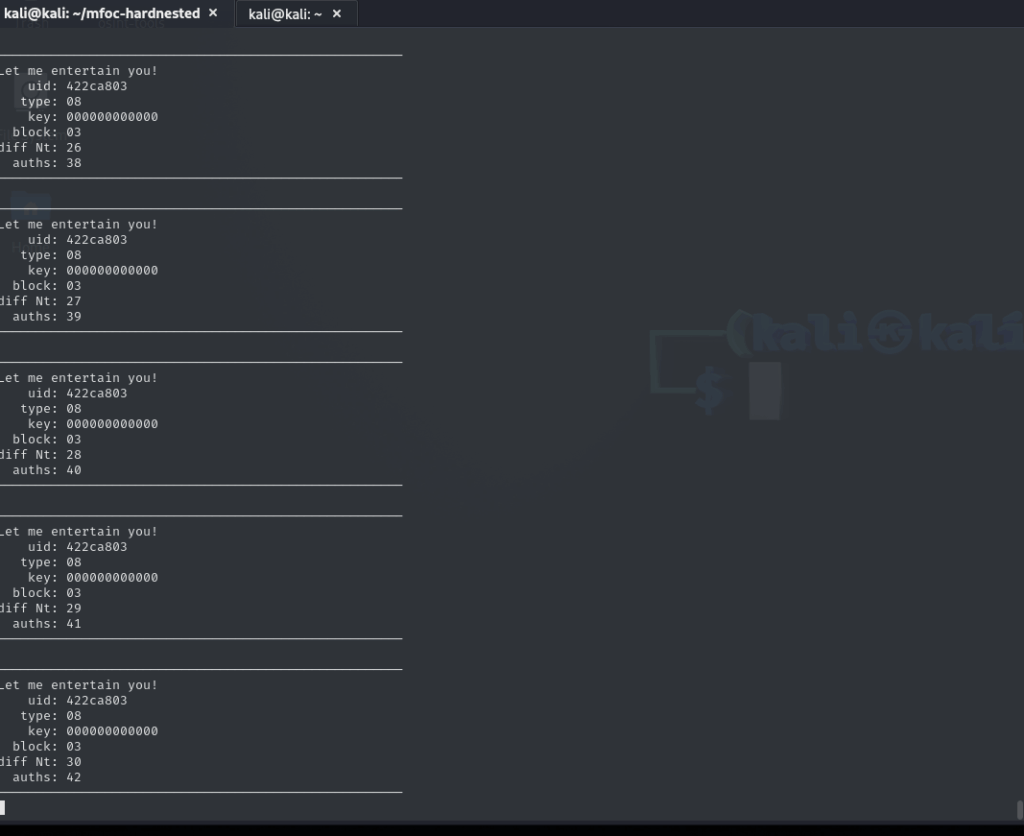
Before getting frustrated and bringing out the heavy artillery, let’s try one last trick: what’s known as the “hardnested attack.” This is a more refined version of the nested attack, which involves capturing a large number of nonces (encrypted pseudo-random numbers). Once captured, an offline analysis is performed to reduce the key space as much as possible, followed by a brute-force attack to discover the key. It’s an attack that should work in most cases (unless you’ve run into a Chinese clone of a MIFARE card).
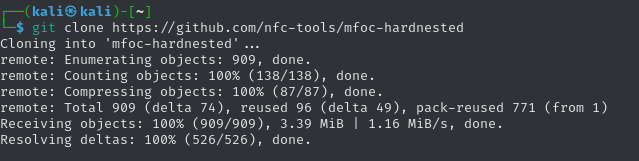
This attack is carried out using the tool mfoc-hardnested, which can be found on GitHub.
The tool is launched with the same parameters as the original mfoc, but in my case, after another 3 days of the computer giving it everything it had, it still couldn’t retrieve the key.
We could give up and leave it there—after all, as an introduction to RFID hacking, it’s not bad, and most MIFARE cards you’ll come across can be cracked with these tools…
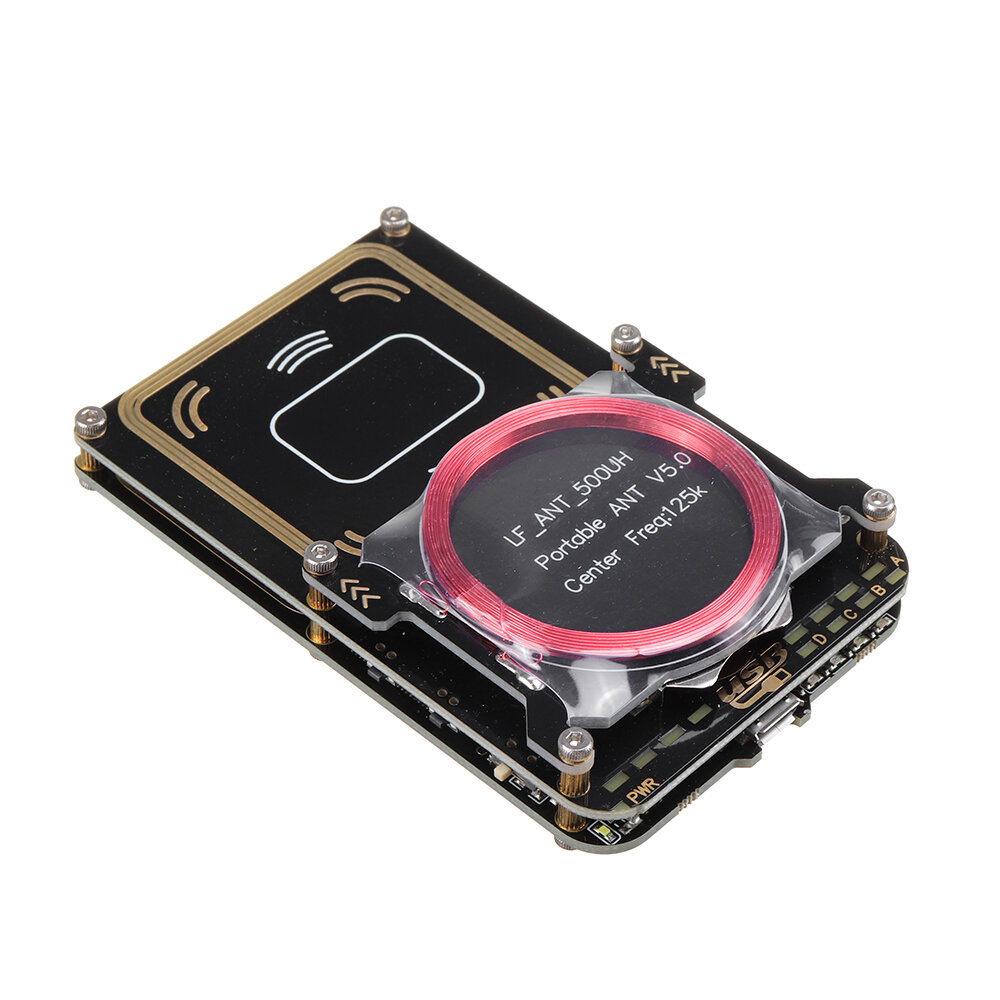
But my pride won’t let me leave it unfinished, so let’s bring out the heavy artillery: we’re going to get a Proxmark 3. What’s a Proxmark 3? It’s a little device roughly the size of a credit card—and it’s amazing. It lets you read RFID cards, clone them, eavesdrop on the “conversation” between a card and a real reader (to figure out how the protocol works), and even emulate (impersonate) a real card.
One of the unique features of this device is that you can control and measure everything at a low level—from read/write power, response times, control bits that traditional readers mask and don’t provide… which opens up a whole new range of possibilities.
When you get your hands on one of these little gadgets, the first thing you should do is download the GitHub repository that contains the updated firmware for the reader, as well as the software used to communicate with it. There are several versions of this firmware, but one of the most widely used by the community is known as the Iceman Fork, which can be found at the following link:
https://github.com/rfidResearchGroup/proxmark3
Before doing anything with this software, we must first make sure to install a series of dependencies:
$ sudo apt-get install –no-install-recommends git ca-certificates build-essential pkg-config \ libreadline-dev gcc-arm-none-eabi libnewlib-dev qtbase5-dev libbz2-dev libbluetooth-dev
Sometimes, if you’re using the Kali Linux distribution, there’s a service that can cause issues and make communication with the Proxmark fail. It’s the modemManager service. The good news is that most users don’t use it for anything (it manages 3G/4G modem connections), so we can disable it by typing in the console:sudo service modemManager stop
Now it’s time to compile. If we did everything right up to this point, there shouldn’t be any problem. In the console, we type:make clean && make PLATFORM=PM3GENERIC
Once that’s done, the next step is to update the reader’s firmware.
WARNING! If any eager reader looking to experiment decides to buy a Proxmark3 clone instead of the original (we listen but don’t judge… ahem), make sure to buy the version with 512K of memory, otherwise you may find that some firmware versions won’t fit on the device.
To flash it, just connect the device to your computer via USB and run:./pm3-flash-all
Then wait to see what happens.
If the process throws an error, you may need to unplug the Proxmark, press the side button it has, and while still holding it, plug it back in and run the command above again (don’t release the button until flashing is complete).
And if it still fails, you may need to repeat the previous step, but instead run:./pm3-flash-bootrom
Once completed, then run:./pm3-flash-fullimage
This first replaces the bootloader and then the device firmware.
Now we’re truly ready. With the reader connected to the PC, place the card on top and run the command ./pm3 to launch the interface.
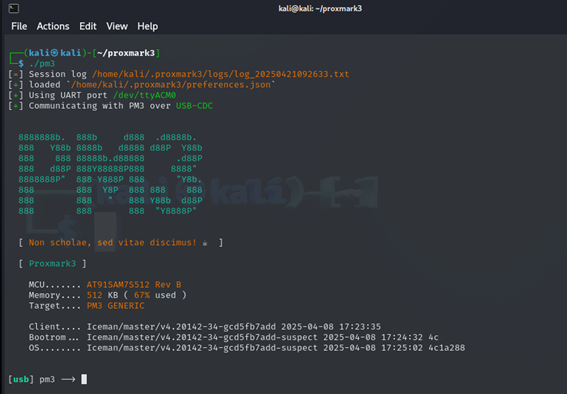
Now, note two important things. Mastering the Proxmark3 completely takes time—the number of tools and features it can run grows every day, and this is just a tiny introduction. That said, this particular firmware is very well documented online, and you’ll be able to find everything you need to keep moving forward.
Secondly, if you have any doubts, in any submenu you can run the help command, which will display additional information about all available commands. As you use the software, it will also suggest what your next steps should be.
For us, the first step is to identify the card we’re dealing with, and that’s done using the command: hf search
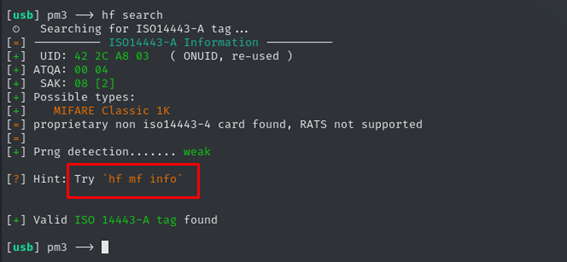
As we can see, it identifies the card, the UID (the serial number that should be unique for each card, although in this case it tells us it’s a reused number), it identifies the card as a Mifare Classic 1K, it tells us that the pseudo-random number generator is weak (PRNG), and it suggests our next command: hf mf info.
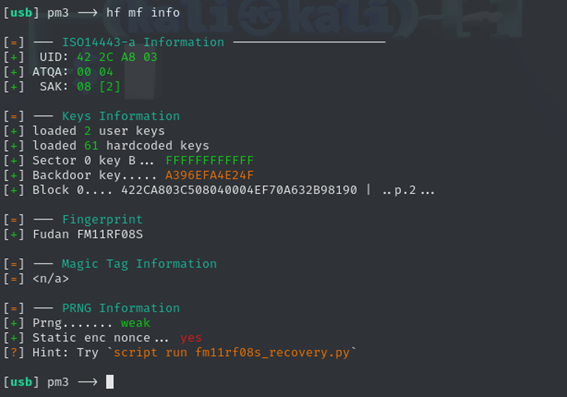
This command gives us more insight: We’ve just discovered that the chip in the card is not an original MIFARE, but a Fudan FM11RF08S. A Chinese chip that can emulate the behavior of a MIFARE chip.
Why did we encounter this? Quick answer: Public transportation cards are usually purchased through public tender, and it turns out that clones are much cheaper than the originals. For practical purposes, no one who doesn’t analyze the card at this level will notice the difference.
As we can see, the program itself suggests the next command we should execute: script run fm11rf08s_recovery.py. Let’s go ahead:

As we can see, we now have the key that unlocks all the sectors of the card. In this case, they’ve used the same key for all sectors. I don’t mind showing it because in this company’s case, they don’t use the same key for all their cards — each card has a different key, which suggests it’s probably calculated using some formula based on the UID or a specific block of the card that can be read without a password.
Now, if we take a closer look, we see that the program gives us two extra keys for sector 32, but a MIFARE Classic card only has 16 sectors. So, what’s that sector doing there?
Well, that sector is most likely part of the memory area used to configure the “Fudan” chip and modify its behavior.
Alright, we have the key, but we’re not done yet. We’ve gained unlimited access to the card’s memory, and now we need to work with the data it contains.
Using the mfoc software we mentioned earlier, we can dump the card’s memory. You can also do it with the Proxmark3. But the easiest way, if you have an Android phone with NFC support, is to install the Mifare Classic Tool app.
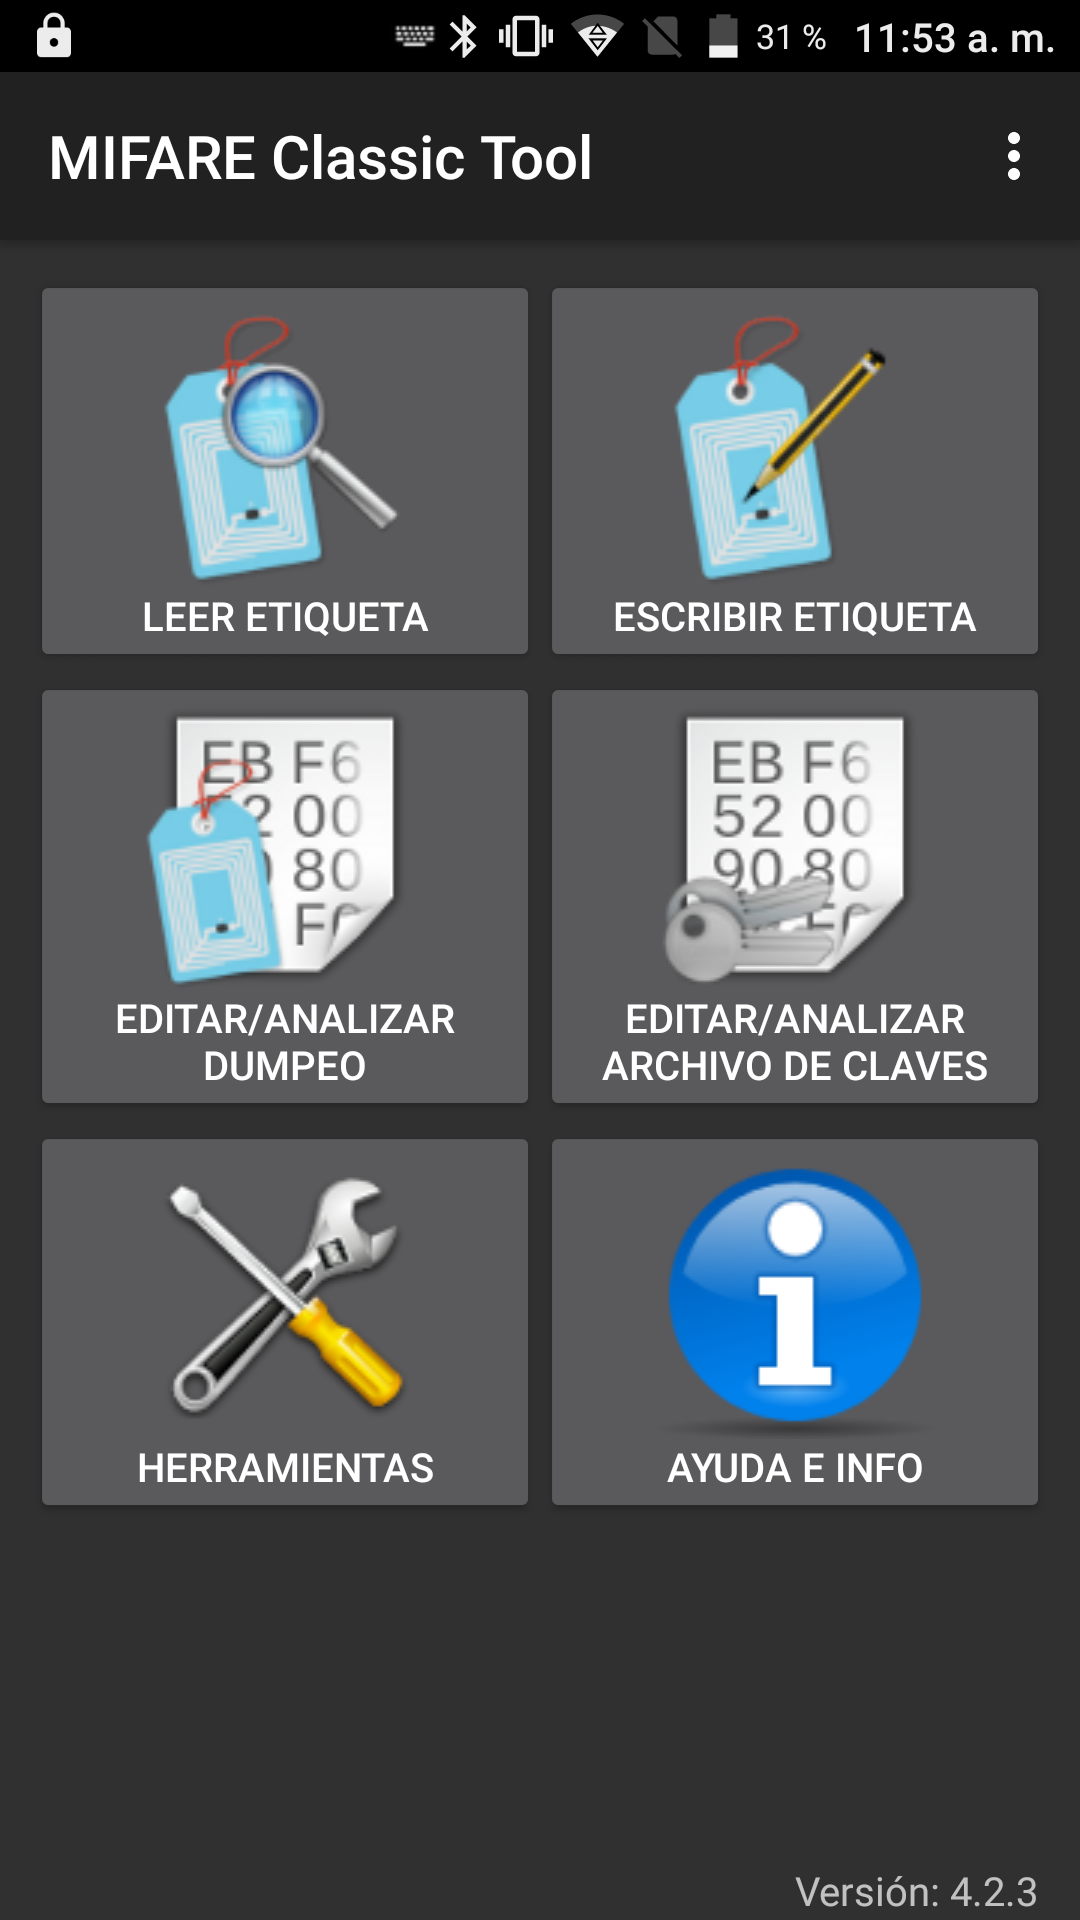
In this app, the first thing you need to do is go to the Edit/Analyze Key File option, create a new file, and add the key we just discovered.

Then we can go to the “Read Tag” option, place the card near the NFC antenna of our phone, select the key file we just created, and hit read. The result should look something like this:

In this case, only sectors 8, 11, and 15 contain data. We don’t know what exactly is stored in this memory. Somewhere in there is the balance, somewhere else there might be a date… Figuring it out requires a thorough analysis of the data, playing with bits, offsets… and above all, making purchases with the card, noting the remaining balance, date and time, and then dumping the memory again.
I won’t go into those details here, but — is it possible? Yes, it is.
That’s it for today’s post, as I’ve already gone way longer than I intended. If you found this topic interesting, would like to read something more in-depth about what the Proxmark3 can do, or have any other subject in mind that intrigues you — PLEASE, I’D LOVE FOR YOU TO SUGGEST TOPICS IN THE COMMENTS THAT YOU’D LIKE ME TO COVER.